Label printing in your .NET application with a DYMO LabelWriter 450
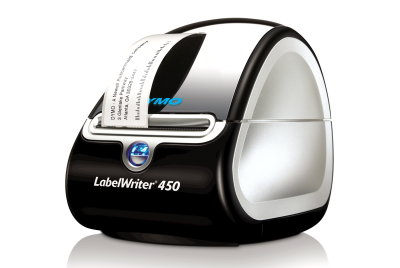
I am involved in a side project to create a minor visitor management application. One feature is to print name badges. This post is about my first experience to use DYMO:s LabelWriter 450 and their .NET SDK to communicate with it.
Choice of label printer
Internet is flooded with articles about the best choice of label printers and I have no previous experience with such printers. My choice of a DYMO LabelPrinter was a combination of price, positive reviews, nice design and a .NET SDK. Future will tell if my choice was right.
Dymo offer a couple of different LabelWriters. You can read more about them here.
I picked a LabelWriter 450 for around 70$. As usual with these printer products it is the ink and papers that cost you in the long term. Good news: The Dymo LabelWriters use thermal printing. Bad news: The printer only accepts slightly overpriced DYMO thermal paper labels. These labels come in different sizes and adhesive or not.
You can read and see more about the printer at Amazon, Dymo and Youtube.
Install printer
Let’s get started and install the printer. I am on a Windows 8 system.
All software you need can be found at Dymos homepage. You can skip the SDK installation with docs and samples for this test because the Dymo Label Software will install everything you need on your dev machine.
Steps:
- Install the Dymo Label Software (v 8.5 atm).
- Plug in the power adapter.
- Connect the printer to your dev machine with the USB cable.
- Load the labels as described in the manual.
Test Printer
Steps:
- Start the Dymo Label v8 application.
- Select correct label type. My included labels were “large address 36mmx89mm).
- Select a layout.
- Click the Print-button.
Hopefully the printer produced a label for you now.
You can read more about what you can do with the Dymo Label application at the product page. We will just use it for creating a label template in this blog post.
Create a label template
Open the Dymo Label v8 application.
- Select LabelType and use an empty layout.
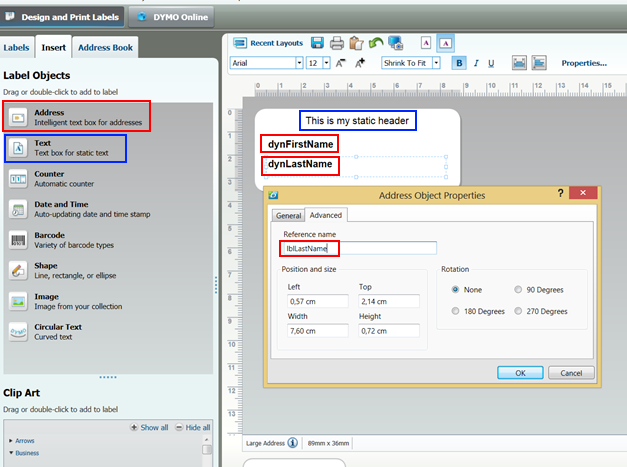
- Insert one static header “Text” and two dynamic texts “Address” as showed on the image below.
- Right click on the dynamic texts, select properties and the advanced tab. Input the reference names as lblFirstName and lblLastName.
- Finally save the label template on your hard disk with the name ”LargeAddressTestLabel.label”.
.NET Application
As I mentioned DYMO includes a .NET SDK we can use to communicate with the printer. You can read more about it and see examples at dymodevelopers. I received great support from the team when asking a question about the SDK.
Steps:
- Create a WPF solution in Visual Studio (or any other .NET application of your choice. Please notice that the SDK does not support Windows RT apps)
- Include the label template file you created before in your Visual Studio project and set the copy to output directory property to ”Copy always”.
- Reference the DYMO.Label.Framework in your Project.
- Write the following code:
public void Print(string firstName, string lastName) { var label = Label.Open("LargeAddressTestLabel.label"); label.SetObjectText("lblFirstName", firstName); label.SetObjectText("lblLastName", lastName); label.Print("DYMO LabelWriter 450"); } - You can iterate the result from Framework.GetPrinters() to find out the exact LabelWriter name if you use an other model than the 450.
- Call your Print()-method from a GUI-button
- Run the application and the label printer will print a label with dynamic data.
Thats it 🙂
Conclusion
My first experience with DYMO:s label printer and SDK is good. It has been straightforward without any problems. Next step will be to design a nice label template together with a GUI and find out how the printer works for more than just a few test prints.
Trackback URL: https://codeblog.silfversparre.com/2013/03/label-printing-in-your-net-application-with-a-dymo-labelwriter-450/trackback/


